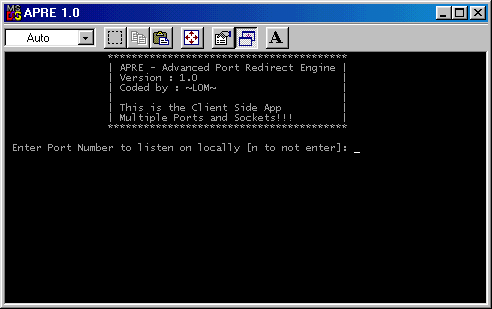
APRE
Released 21 years, 8 months ago. August 2003
Copyright © MegaSecurity
By ~LOM~

Informations
| Author | ~LOM~ |
| Family | APRE |
| Category | Remote Access |
| Version | APRE |
| Released Date | Aug 2003, 21 years, 8 months ago. |
| Language | Delphi |
Author Information / Description
^^^^^^^^^^^^^^^^^^^^^^^^^^^^^^^^^^^^^^^^^^^^^^^^^^^^^^^^^^^^^^^^^^^^^^^^^^^^^^^^^^^^^^^^^^^^^^^
  APRE v1.0
  By ~LOM~

  This Application should only explicitly be used on authorized networks. Its a tool
  used for easy port routing of applications that dont have LAN Support.

  Shoutoutz to : EES Teams,
    Sleaze, Spydar, Astrealz, Slipk, xMs, GSEPP, LOKI,
    And anyone i might have forgotten :)

^^^^^^^^^^^^^^^^^^^^^^^^^^^^^^^^^^^^^^^^^^^^^^^^^^^^^^^^^^^^^^^^^^^^^^^^^^^^^^^^^^^^^^^^^^^^^^^

APRE - Advanced Port Redirection Engine:
----------------------------------------

APRE is a basic bridge between a client and server. It acts as an inbetweener so you can connect
things like Optix Pro to people who have an ip address like 192.168.0.1 . This is how APRE works

* The Apre_server is installed remotely along with a server of your choice (OP/Net Devil)
* The Apre_server then connects backwards to the apre_client to form a connection 'bridge'
* You then connect your client (eg OP client) to the Apre_client which in turns connects to the
  Apre_server which in turn connects to your server

  Order of Events :

                   APRE Client <--- APRE Server
  Your Client ---> APRE Client <--- APRE Server
  Your Client ---> APRE Client <--- APRE Server ---> Your Server
  {Your Client ---> APRE Client <--- APRE Server ---> Your Server} = Repeats for each socket.
  The arrows specify the direction in which the connection is happening.

  In the meantime the APRE engine detects multiple sockets trying to establish, and orderly
  connects them.
* You can bundle APRE with a RAT and 'hope' its functional, OR you can upload a Lan/fwb uploader
  first and then run the apre_server with parameters like the following :

Parameter Descriptions For Server
---------------------------------

  *server.exe* = The path to the server
  <Your ip> = your net ip (not local)
  <local port> = The port on your computer that will be opened to communicate reversely.
  {remote port} = Optional param (if not inputted, the remote port will be the local port too!)
  {IP Address} = Optional param (if not inputted, will connect to 127.0.0.1/localhost)

If you want to open multiple ports - you can seperate the port with ; for example
( *server.exe* <Your ip> <55;4056;321;45> <435;3456;45;34> )
 <-- this will correspond port 55 locally to 435 remotely

( *server.exe* <Your ip> <55;4056;321;45> )
 <-- port 55 will be the params both locally and remotely

Its important you dont leave a trailing ; on the port! the actual syntax isn't error checked
therefore its very sensitive.

Parameter Descriptions For Client
---------------------------------

*client.exe* = the path to your client
{hide client} '-h'
<Ports> = ports to open locally

( *client.exe* <Ports> )
( *client.exe* <55;4056;321;45> )

eg

  *client.exe* {-h} <ports>
  = hide the client

  *client.exe* <ports>
  = show the client and auto add ports

=============================================================================================

Usage Standard Port redirection Walk Through With Params :
----------------------------------------------------------

	Step 1.)  Open Client.exe
	Step 2.)  Enter port Number
	Step 3.)  Upload Server.exe to remote computer
	Step 4.)  Run the server with Parameters (as follows)

( *server.exe* <Your ip> <local port> {remote port} {IP Address} {Inject To App} )

key
---
*  = Path to server.exe
<> = Needed parameters
{} = Optional Parameters (if not default setting is enabled)

	Step 5.)  Look in Client and you should see "Initialisation Successful"
	Step 6.)  Open your chosen client application for remote browsing
	Step 7.)  Enter the details 127.0.0.1 (or net ip if connecting from a foriegn Address)
                  in your client
	Step 8.)  Enter Local Port as you have chosen in your client
	Step 9.)  Connect and wait for all sockets to officially establish!!! (could take
                  several seconds)
	Step 10.) Use application as you would normally.

       Some applications use more than one port (it might not even be documented).
       EG. Optix Pro, Sub7, Bionet

=============================================================================================

~LOM~
If you recognize any personal information on this page and wish to have it removed or redacted, please contact us at jplesueur@phrozen.io. We are committed to protecting your privacy in accordance with GDPR regulations.